
Hardwood floors have become a popular choice for homeowners due to their numerous benefits. They offer timeless elegance, and durability, and can increase the value of a property. However, proper installation is crucial for ensuring their longevity and aesthetic appeal.

Types of Hardwood Floors
Solid Hardwood Floors
- Description and characteristics of solid hardwood: Solid hardwood flooring is made from a single piece of lumber milled into planks. It is known for its natural beauty, as each plank showcases the unique grain patterns and colors of the wood.
- Pros and cons of solid hardwood floors: Solid hardwood floors are highly durable and can be refinished multiple times. However, they are susceptible to moisture and are not recommended for below-grade installations.
- Popular wood species used for solid hardwood floors: Oak, maple, cherry, and walnut are among the popular species used in solid hardwood flooring due to their durability and aesthetic appeal.

Engineered Hardwood Floors
- Description and characteristics of engineered hardwood: Engineered hardwood consists of multiple layers of wood glued together, with a top layer of hardwood veneer. This construction makes it more resistant to moisture and provides stability.
- Pros and cons of engineered hardwood floors: Engineered hardwood floors can be installed in moisture-prone areas and are more resistant to warping than solid hardwood. However, they can only be refinished a limited number of times.
- Popular wood species used for engineered hardwood floors: Hickory, birch, and oak are commonly used in engineered hardwood flooring due to their strength and stability.

Preparing for Hardwood Floor Installation
Measurement and Planning
- Measuring the area to calculate the required materials: Accurate measurements of the room’s length and width are necessary for determining the amount of hardwood flooring needed.
- Determining the direction of the floorboards: The direction of the floorboards can impact the visual flow of the room. Consider factors such as natural lighting and the room’s layout when deciding on the direction.
- Assessing the subfloor condition and addressing any issues: A level and structurally sound subfloor is essential for a successful hardwood floor installation. Inspect for any unevenness, damage, or moisture problems that need to be addressed before laying the new flooring.
Choosing the Right Hardwood
- Factors to consider when selecting hardwood flooring: Consider factors such as the room’s function, traffic levels, and aesthetic preferences when choosing the type and color of hardwood flooring.
- Understanding wood grades, finishes, and thickness: Wood grades categorize the visual quality of hardwood flooring, while different finishes can enhance durability and appearance. The thickness of the flooring should be chosen based on the subfloor condition and any height restrictions.
- Comparing the cost and durability of different hardwood options: Evaluate the cost and durability of various hardwood options to ensure the chosen flooring meets both budgetary and performance requirements.

Essential Tools and Materials Needed
Tools for Preparation
- List of tools required for subfloor preparation: A tape measure, chalk line, circular saw, pry bar, and a utility knife are among the essential tools needed to prepare the subfloor.
- Tools needed for removing existing flooring materials (if applicable): Depending on the existing flooring material, tools such as a floor scraper, nail puller, or adhesive remover may be required.
- Additional tools for leveling and smoothing the subfloor: Tools like a floor leveling compound, trowel, hammer, and belt sander may be necessary to ensure a smooth and level subfloor surface.

Tools for Installation
- Comprehensive list of tools for installing hardwood floors: A flooring nailer, mallet, pneumatic stapler, tape measure, and a flooring saw are some of the essential tools needed for the actual installation.
- Specialty tools for specific installation techniques: Depending on the desired installation technique, tools such as a pull bar, tapping block, or a jigsaw may be required.
- Recommended safety equipment: Safety glasses, hearing protection, and knee pads are important safety equipment to protect against any potential hazards during the installation process.
Subfloor Preparation
Subfloor Inspection and Repairs
- Checking for moisture and addressing any issues: Moisture can lead to warping and damage to the hardwood floor over time. Test the moisture levels of the subfloor using a moisture meter and address any issues before installation.
- Repairing or replacing damaged subfloor sections: Inspect the subfloor for any damaged or weakened areas and replace or repair them to ensure a stable foundation for the hardwood flooring.
- Using moisture barriers and underlayment as necessary: Depending on the subfloor type and moisture levels, installing a moisture barrier or underlayment may be necessary to protect the hardwood floor from moisture damage.
Leveling and Smoothing the Subfloor
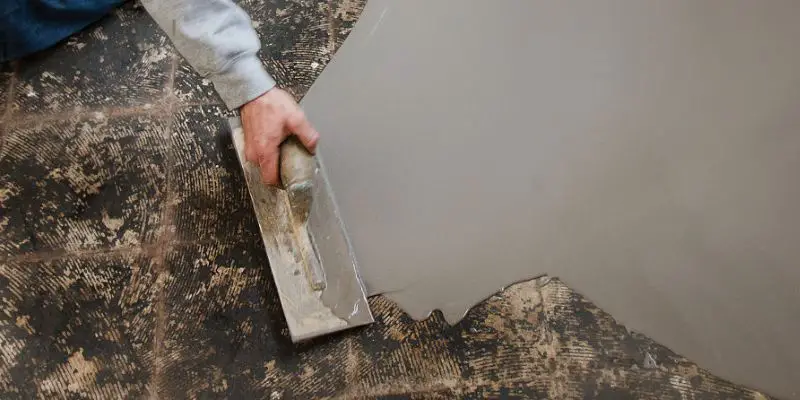
- Techniques for ensuring a flat subfloor surface: Use a long level or a straightedge to check for any unevenness in the subfloor. Depending on the severity, techniques such as floor sanding, shimming, or using a self-leveling compound can be employed.
- Patching and filling gaps, holes, and cracks in the subfloor: Fill any gaps, holes, or cracks in the subfloor using the appropriate floor patching compound or leveling compound. Sand down any excess filler to create a smooth surface.
- Sanding or grinding high spots to create a uniform surface: High spots on the subfloor can cause unevenness in the hardwood flooring. Use a belt sander or grinder to remove the high spots and ensure a level surface for installation.
Installing Hardwood Floors: Step-by-Step Guide
Acclimating the Hardwood
- Importance of acclimation to prevent warping or buckling: Acclimating hardwood flooring is essential to allow it to adjust to the humidity and temperature of the installation environment, preventing issues like warping or buckling.
- Recommended acclimation period based on wood species: Different wood species require varying acclimation periods. Follow the manufacturer’s recommendations for the specific hardwood being installed.
- Proper storage conditions during acclimation: Store the hardwood flooring in the room where it will be installed, ensuring that the environmental conditions (temperature and humidity) are similar to those during normal occupancy.

Floorboard Layout and Design
- Determining the optimal layout for a visually appealing result: Plan the layout of the floorboards to achieve balance and visual appeal. Consider factors such as natural light sources, room entrances, and furniture placement.
- Different design patterns, such as herringbone or diagonal installation: Explore different design patterns like herringbone, diagonal, or parquet installation to add a unique touch to the hardwood flooring.
- Incorporating borders and decorative elements: Borders and decorative elements can enhance the visual interest of the hardwood floor. Plan ahead and use additional tools such as a miter saw or a router to create these design features.
Installing the First Row
- Tips for starting the installation process correctly: Start the installation by laying the first row parallel to the longest wall in the room. Ensure a proper expansion gap between the floorboards and the wall.
- Methods for maintaining straightness and alignment: Use a flooring nailer or stapler to secure the first row, ensuring that each board is aligned and straight. Check periodically with a straightedge or level.
- Handling irregular edges and obstacles: Cut the last board of the first row to fit against irregular edges or obstacles such as doorways or heating vents, using appropriate cutting tools.

Continuing with the Floor Installation
- Step-by-step instructions for laying subsequent rows: Continue installing the remaining rows by interlocking the tongue and groove of each plank. Use the appropriate tools, such as a flooring nailer or stapler, to secure the floorboards.
- Techniques for achieving tight joints and avoiding gaps: Ensure a snug fit between each board to avoid gaps. Use tapping blocks, pry bars, or pull bars to ensure tight joints during installation.
- Dealing with outlets, doorways, and other cutouts: Accurately measure and cut the floorboards to fit around outlets, doorways, and other cutouts. Consider using appropriate tools, such as a jigsaw or chisel, to achieve precise cuts.
Finishing and Final Touches
Sanding the Hardwood Floors
- Choosing the right sandpaper grits and equipment: Start with coarse grit sandpaper and gradually move to finer grits to achieve a smooth and even surface. Use a floor sander for larger areas and a hand sander for edges and corners.
- Sanding technique for a smooth and even surface: Sand in the direction of the wood grain to avoid scratches. Overlap each pass and ensure uniform sanding across the entire floor.
- Sanding between coats of finish: After sanding, remove the sanding dust and apply multiple coats of finish, lightly sanding between each coat to achieve a professional finish.
Applying the Finish
- Different types of finishes (polyurethane, oil, water-based, etc.): Choose a finish based on personal preference and durability requirements. Options include polyurethane, oil-based, water-based, or wax finishes.
- Step-by-step process for applying the chosen finish: Follow the manufacturer’s instructions for applying the chosen finish. Use a brush, roller, or sprayer for even application and allow sufficient drying time between coats.
- Tips for achieving a professional-looking finish: Apply thin and even coats, working in small sections. Feather the edges to avoid visible overlap marks and ensure proper ventilation during the application process.

Installing Baseboards and Trim
- Selection and preparation of baseboards and trim: Choose baseboards and trim that complement the hardwood floor. Sand and finish them before installation, if necessary.
- Techniques for cutting and installing trim pieces: Use a miter saw or coping saw to cut baseboards and trim at the appropriate angles. Secure them to the walls using a finish nailer or adhesive.
- Proper finishing and sealing of trim elements: Fill nail holes and gaps in the trim with wood filler, sand smooth, and finish the trimmed elements to match the rest of the room.

Maintenance and Care of Hardwood Floors
Regular Cleaning and Maintenance
- Best practices for routine cleaning and maintenance: Use a soft-bristle broom or a vacuum with a hardwood floor attachment to remove dust and debris regularly. Wipe up spills immediately using a damp cloth and avoid excessive moisture.
- Recommended products and tools for cleaning hardwood floors: Use hardwood floor cleaners specifically designed for the type of finish and follow the manufacturer’s instructions. Avoid harsh chemicals and excessive water.
- Dealing with common issues like scratches and stains: Use touch-up markers or wood filler to address minor scratches. For stains, use appropriate stain removers or consult with a professional if necessary.
Preventative Measures
- Tips for protecting hardwood floors from furniture and pets: Use furniture pads or rugs under heavy furniture to prevent scratching. Trim pets’ nails regularly and use pet-friendly rugs to protect high-traffic areas.
- Maintaining humidity levels to prevent warping and shrinking: Use humidifiers or dehumidifiers as needed to maintain relative humidity levels between 35% and 55% to minimize the risk of warping or shrinking.
- Using rugs and mats to safeguard high-traffic areas: Place rugs or mats in high-traffic areas to reduce wear and tear. Ensure they have a non-slip backing to prevent accidents.

Summary
Proper installation techniques are essential to ensure the longevity and aesthetic appeal of hardwood floors. From choosing the right hardwood and preparing the subfloor to installing, finishing, and maintaining the floors, attention to detail is key. Remember to follow the manufacturer’s instructions and consult professionals when needed.
