After a few years of installing Tile floors, depending on how you clean them, you might notice that they are turning from white to yellow. In this comprehensive guide, we will walk you through the step-by-step process of cleaning your floor tiles using vinegar, a natural and eco-friendly alternative to harsh chemical cleaners. From preparing the vinegar solution to applying it to your tiles and removing those stubborn stains, we’ve got you covered.
Not only will vinegar effectively remove dirt and grime from your tiles, but it will also leave them looking shiny and brand new. So, why spend a fortune on expensive cleaners when you can achieve the same results with a simple household ingredient? Get ready to transform your floors and revel in the satisfaction of a spotless home with our ultimate guide to cleaning floor tiles with vinegar!

Why use vinegar for cleaning floor tiles
Vinegar has long been used as a natural cleaning agent due to its acidic properties. When it comes to cleaning floor tiles, vinegar is a versatile and effective option. Unlike harsh chemical cleaners, vinegar is a safe and eco-friendly alternative that won’t harm your family or the environment. Additionally, vinegar is readily available in most households, making it a convenient choice for tackling those stubborn stains on your floor tiles. Using vinegar for cleaning not only saves you money but also ensures that you are using a non-toxic solution that is safe for your home.

The acidic nature of vinegar makes it an excellent cleaner for various types of floor tiles, including ceramic, porcelain, and natural stone. Vinegar cuts through dirt, grease, and grime, leaving your tiles looking clean and shiny. In addition to its cleaning abilities, vinegar also has antibacterial properties, making it an ideal choice for maintaining a hygienic living environment. So, if you’re looking for a natural and effective way to clean your floor tiles, vinegar is the answer!
RELATED POST: Why is my vinyl floor turning yellow.
Preparing the vinegar solution
Before you start cleaning your floor tiles with vinegar, it’s essential to prepare the vinegar solution correctly. Here’s a simple step-by-step guide to help you get started:
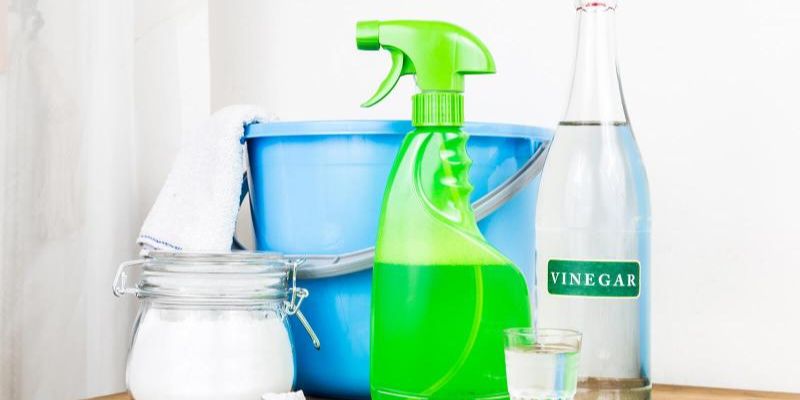
1. Fill a bucket or spray bottle with equal parts of white vinegar and water. The vinegar-to-water ratio may vary depending on the level of dirt and stains on your floor tiles. For mild cleaning, a 1:1 ratio should suffice. However, for more stubborn stains, you can increase the vinegar concentration by using a higher ratio of vinegar to water.
2. If you prefer a fragrant scent while cleaning, you can add a few drops of essential oil, such as lavender or lemon, to the vinegar solution. This will help mask the strong smell of vinegar and leave a pleasant aroma in your home.
3. Once you’ve prepared the vinegar solution, give it a good stir to ensure that the vinegar and water are thoroughly mixed. Now you’re ready to start cleaning!

By preparing the vinegar solution correctly, you’ll be able to maximize its cleaning power and achieve the best results when cleaning your floor tiles.
Testing the vinegar solution on a small area
Before you apply the vinegar solution to your entire floor, it’s essential to test it on a small, inconspicuous area first. This is especially important if you have delicate or sensitive tiles, as vinegar’s acidic nature may cause damage or discoloration. To perform the test, follow these steps:
1. Choose a small area on your floor where you can apply the vinegar solution without it being noticeable.
2. Apply a small amount of vinegar solution to the test area using a sponge or cloth.
3. Let the solution sit on the test area for a few minutes, then wipe it off with a clean, damp cloth.
4. Inspect the test area for any signs of damage or discoloration. If there are no adverse effects, you can proceed with cleaning the rest of your floor tiles using the vinegar solution.
By conducting a test on a small area, you can ensure that the vinegar solution is safe to use on your floor tiles without causing any unwanted damage.
Cleaning different types of floor tiles with vinegar
Vinegar is a versatile cleaner that can be used on various types of floor tiles. Here’s how you can clean different types of floor tiles using vinegar:
Ceramic tiles
Ceramic tiles are a popular choice for many homeowners due to their durability and low maintenance. To clean ceramic tiles with vinegar, follow these steps:
1. Sweep or vacuum the floor to remove any loose dirt and debris.
2. Fill a bucket or spray bottle with the vinegar solution, as mentioned earlier.
3. Dip a mop or sponge into the vinegar solution, then wring out any excess liquid.
4. Thoroughly mop the ceramic tiles, ensuring that the vinegar solution covers the entire surface.
5. For stubborn stains, you can use a soft-bristle brush or toothbrush dipped in the vinegar solution to scrub the affected area gently.
6. Once you’ve cleaned the entire floor, rinse it with clean water to remove any residual vinegar.
7. Dry the floor with a clean towel or allow it to air dry.
By following these steps, you can effectively clean ceramic tiles with vinegar, leaving them looking fresh and spotless.
Porcelain tiles
Porcelain tiles are known for their strength and resistance to stains, making them a popular choice for areas prone to spills and heavy foot traffic. To clean porcelain tiles with vinegar, here’s what you need to do:
1. Remove any loose dirt and debris from the floor by sweeping or vacuuming.
2. Prepare the vinegar solution using the instructions provided earlier.
3. Apply the vinegar solution to the porcelain tiles using a mop or sponge. Make sure to cover the entire surface.
4. Allow the vinegar solution to sit on the tiles for a few minutes to loosen dirt and grime.
5. Use a soft-bristle brush or mop to scrub the tiles gently. Pay extra attention to any stubborn stains or high-traffic areas.
6. Rinse the floor with clean water to remove any remaining vinegar solution.
7. Dry the floor thoroughly with a clean, dry towel or allow it to air dry.
By following these steps, your porcelain tiles will be left looking clean and free from stubborn stains, thanks to the power of vinegar.
Natural stone tiles
Natural stone tiles, such as marble, granite, and travertine, require extra care when cleaning to avoid damage. Here’s how you can clean natural stone tiles with vinegar safely:
1. Begin by sweeping or vacuuming the floor to remove loose dirt and debris.
2. Mix a milder vinegar solution by diluting one part vinegar with three parts water. This will help protect the natural stone from potential damage caused by the acidity of vinegar.
3. Apply the diluted vinegar solution to the natural stone tiles using a mop or sponge. Make sure to cover the entire surface.
4. Gently scrub the tiles using a soft-bristle brush or mop. Avoid using abrasive materials that may scratch or etch the natural stone.
5. Rinse the floor with clean water to remove any residual vinegar solution.
6. Dry the floor thoroughly with a clean, dry towel to prevent water spots or stains on the natural stone.
By following these steps and using a milder vinegar solution, you can safely clean and maintain the beauty of your natural stone tiles.
Removing stubborn stains with vinegar
Stubborn stains can be a nightmare to remove from floor tiles, but vinegar can be your secret weapon in tackling even the toughest marks. Here’s how you can remove stubborn stains with vinegar:
1. Identify the stubborn stain on your floor tiles and prepare the vinegar solution using the instructions provided earlier.
2. Apply the vinegar solution directly to the stained area, ensuring that it is thoroughly saturated.
3. Let the vinegar solution sit on the stain for at least 10-15 minutes to allow it to penetrate and loosen the stubborn dirt.
4. Use a soft-bristle brush or sponge to gently scrub the stain in a circular motion. Be careful not to scrub too hard, as this may damage the tiles.
5. Rinse the area with clean water to remove any residual vinegar and dirt.
6. Repeat the process if necessary until the stubborn stain is completely gone.
By using vinegar as a targeted stain remover, you can effectively eliminate even the most stubborn marks on your floor tiles.
Tips for effective floor tile cleaning with vinegar
To ensure that you achieve the best results when cleaning your floor tiles with vinegar, here are some additional tips to keep in mind:
1. Always sweep or vacuum the floor before cleaning to remove loose dirt and debris. This will prevent them from scratching the tiles during the cleaning process.
2. Avoid using vinegar on waxed or sealed tiles, as it may strip away the protective coating.
3. For extra shine, you can add a few drops of olive oil to the vinegar solution. This will help leave a glossy finish on your floor tiles.
4. Open windows or provide proper ventilation while cleaning with vinegar to dissipate the strong smell.
5. Regularly clean your mop or sponge to prevent the transfer of dirt and grime to other areas of the floor.
6. If you have pets, make sure to keep them away from the vinegar solution, as it may be harmful if ingested.
By following these tips, you can ensure that your floor tile cleaning with vinegar is effective and hassle-free.
Safety precautions when using vinegar for cleaning
While vinegar is a safe and natural cleaning agent, it’s essential to take some safety precautions when using it to clean your floor tiles. Here are a few measures to keep in mind:
1. Always wear gloves when handling vinegar to protect your skin from any potential irritation.
2. Avoid mixing vinegar with bleach or other chemical cleaners, as this may produce harmful fumes.
3. Use vinegar in a well-ventilated area to avoid inhaling the strong smell.
4. Store vinegar in a cool, dark place away from direct sunlight and heat sources.
5. Keep vinegar out of reach of children and pets to prevent accidental ingestion.
By following these safety precautions, you can enjoy the benefits of using vinegar for cleaning without any risks to your health or well-being.
Alternative cleaning methods for floor tiles
While vinegar is an excellent natural cleaner for floor tiles, there are alternative methods you can try if you don’t have vinegar on hand or prefer to use a different cleaning agent. Here are a few options:
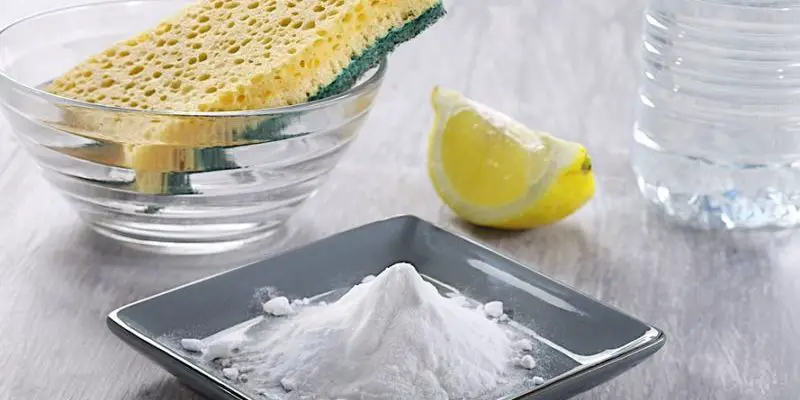
1. Baking soda: Mix baking soda with water to create a paste, then apply it to the stained areas on your floor tiles. Let it sit for a few minutes, then scrub gently with a soft brush before rinsing with clean water.
2. Lemon juice: The acidity of lemon juice can help break down dirt and stains on floor tiles. Mix lemon juice with water and apply it to the stained areas. Let it sit for a few minutes, then scrub gently before rinsing.
3. Hydrogen peroxide: Hydrogen peroxide is a powerful stain remover that can be used on floor tiles. Dilute hydrogen peroxide with water, then apply it to the stained areas. Let it sit for a few minutes, then scrub gently and rinse with clean water.
These alternative cleaning methods can be effective in removing stains from floor tiles if vinegar is not available or preferred.
Conclusion: Enjoy clean and stain-free floor tiles with vinegar
Cleaning floor tiles can be a daunting task, especially when faced with stubborn stains that seem impossible to remove. However, with the power of vinegar, you can say goodbye to those pesky marks and hello to clean and sparkling floor tiles.
Remember to follow the safety precautions and tips mentioned to ensure a hassle-free cleaning experience. So, why spend a fortune on expensive cleaners when you can achieve the same, if not better, results with a simple household ingredient? Get ready to transform your floors and revel in the satisfaction of a spotless home with vinegar as your cleaning ally. Say goodbye to stubborn stains and hello to clean and stain-free floor tiles!

