Hardwood floors are a beautiful and timeless addition to any home. They add warmth, character, and a sense of luxury to your living space. However, over time, hardwood floors can become dull, scratched, and worn out. This can be a frustrating and discouraging situation, but there’s good news: you don’t necessarily have to replace your hardwood floors! In fact, restoring your hardwood floors can be a much more cost-effective and eco-friendly solution.
But where do you start? How do you know what needs to be done, and how can you ensure that your floors will look as good as new? In this article, we’ll take you through the process of restoring your hardwood floors, step by step. We’ll cover everything from assessing the damage to choosing the right products and techniques so that you can enjoy your beautifully restored floors for years to come. So let’s clear up the cloudiness and get those floors looking fabulous again!
Common Causes of Damage to Hardwood Floors
Hardwood floors are durable and can last for decades, but they are not immune to damage. Some common causes of damage to hardwood floors include:
1. Scratches and Dents
Scratches and dents can occur from furniture, pet claws, high heels, and even grit and dirt that gets tracked in from outside. Over time, these small scratches can accumulate and make your floors look dull and worn.
2. Water Damage
Water damage can be caused by leaks, spills, or flooding. If water penetrates the surface of your hardwood floors, it can cause them to warp, buckle, and even rot.
3. Sunlight and UV Damage
Over time, exposure to sunlight and UV rays can cause hardwood floors to fade and lose their luster. This is especially true for floors that are in direct sunlight for extended periods.
Signs Your Hardwood Floors Need to be Restored
If you’re not sure whether your hardwood floors need to be restored, here are some signs to look for:
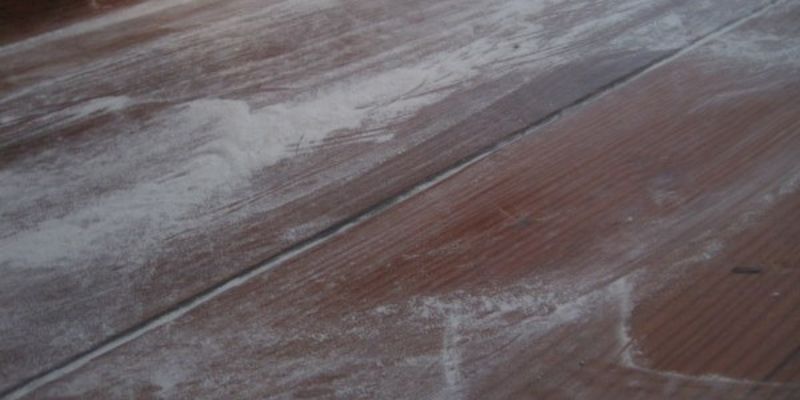
1. Dullness and Discoloration
If your hardwood floors look dull and lack their original shine, it may be time to restore them. This can be caused by wear and tear, exposure to sunlight, and lack of maintenance.
2. Scratches and Dents
If your floors have accumulated scratches and dents over time, it can make them look old and worn out.
3. Warping and Buckling
If your hardwood floors have been exposed to water, they may have warped or buckled. This can cause gaps between the boards and make your floors look uneven.
DIY vs. Professional Restoration
When it comes to restoring your hardwood floors, you have two options: DIY or professional restoration. While DIY restoration may seem like a cost-effective option, it can be a time-consuming and difficult process. Professional restoration, on the other hand, can be more expensive, but it ensures that your floors are restored to their original beauty. Before making a decision, consider the following factors:
1. Time and Effort
Restoring hardwood floors is a time-consuming and labor-intensive process. If you don’t have the time or energy to devote to the project, it may be best to hire a professional.
2. Equipment and Materials
Restoring hardwood floors requires specialized equipment and materials that can be expensive to rent or purchase. Professional restoration companies have access to the latest equipment and products, which ensures a high-quality result.
3. Experience and Expertise
Professional restoration companies have years of experience and expertise in restoring hardwood floors. They know the best techniques and products to use to ensure that your floors look as good as new.
Preparing for Hardwood Floor Restoration
Before you begin restoring your hardwood floors, there are a few things you’ll need to do to prepare:
1. Clear the Room
Remove all furniture and rugs from the room where you’ll be restoring your floors. This will give you space to work and prevent any damage to your belongings.
2. Clean the Floors
Thoroughly sweep or vacuum your floors to remove any dirt or debris. This will ensure that the refinishing process goes smoothly and that the finished result is flawless.
3. Make Necessary Repairs
If your floors have any deep scratches, dents, or cracks, you’ll need to fill them in with wood filler before refinishing. This will ensure that your floors are smooth and even.
Sanding and Refinishing Hardwood Floors
Sanding and refinishing your hardwood floors is a critical step in the restoration process. Here’s what you need to know:
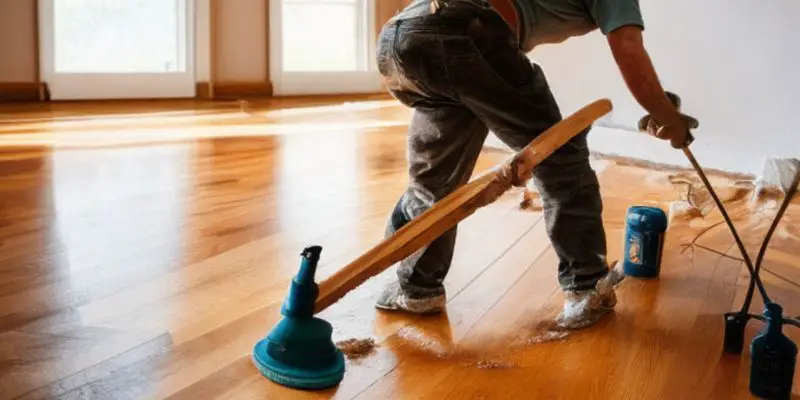
1. Sanding
Sanding is the process of removing the top layer of your hardwood floors to reveal a fresh, smooth surface. This is done using a floor sander, which can be rented from a hardware store. Sanding can be a messy and time-consuming process, but it’s essential for achieving a smooth and even finish.
2. Staining
Staining is optional, but it can add depth and richness to your hardwood floors. The stain is applied after sanding and can be customized to match your desired color. Make sure to choose a high-quality stain that is compatible with your hardwood floors.
3. Sealing
Sealing is the final step in the refinishing process. A sealer is applied to protect your hardwood floors from scratches, spills, and other damage. Make sure to choose a high-quality sealant that is durable and long-lasting.
Staining and Sealing Hardwood Floors
Staining and sealing your hardwood floors is an essential step in the restoration process. Here’s what you need to know:
1. Staining
Staining is the process of adding color to your hardwood floors. It can add depth and richness to your floors and enhance the natural beauty of the wood. Before staining, it’s important to sand your floors to ensure that the stain is applied evenly.
2. Choosing the Right Stain
When choosing a stain, consider the color of your existing hardwood floors and the overall look you want to achieve. There are many different colors and finishes to choose from, so take your time and choose the right one for your home.
3. Sealing
Sealing is the final step in the restoration process. A sealer is applied to protect your hardwood floors from scratches, spills, and other damage. Make sure to choose a high-quality sealant that is durable and long-lasting.
Maintaining Restored Hardwood Floors
Once your hardwood floors have been restored, it’s important to maintain them properly to ensure that they stay looking beautiful for years to come. Here are some tips:
1. Clean Regularly
Sweep or vacuum your hardwood floors regularly to remove dirt and debris. Use a damp mop to clean up spills and stains promptly.
2. Use Furniture Pads
Use furniture pads to prevent scratches and dents caused by furniture. This will ensure that your floors stay looking new for longer.
3. Avoid Sun Damage
Keep your hardwood floors out of direct sunlight to prevent fading and discoloration. Use blinds or curtains to protect your floors from UV rays.
Also read: How to remove haze from hardwood floors
Frequently Asked Questions about Hardwood Floor Restoration
1. How long does it take to restore hardwood floors?
The time it takes to restore hardwood floors depends on the size of the room and the extent of the damage. On average, it takes 3-5 days to restore hardwood floors.
2. How much does it cost to restore hardwood floors?
The cost of restoring hardwood floors varies depending on the size of the room and the extent of the damage. On average, it costs between $3 and $7 per square foot to restore hardwood floors.
3. Can I restore my hardwood floors myself?
While it’s possible to restore hardwood floors yourself, it can be a time-consuming and difficult process. Hiring a professional restoration company ensures that your floors are restored to their original beauty.
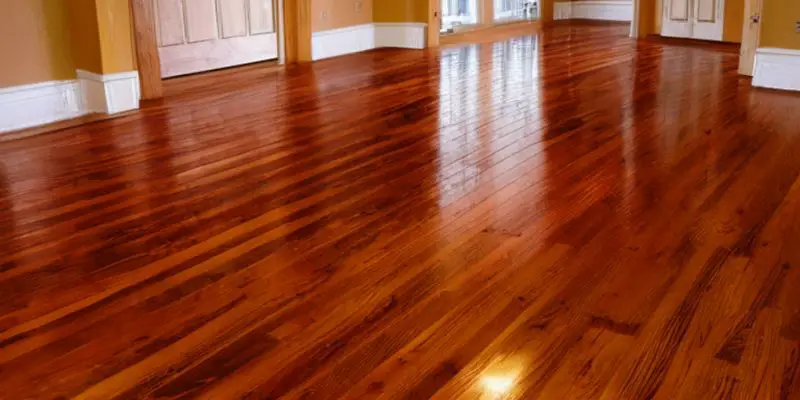
Conclusion
Restoring your hardwood floors can be a cost-effective and eco-friendly solution that can breathe new life into your home. By following the steps outlined in this article, you can restore your hardwood floors to their original beauty and enjoy them for years to come. Whether you choose to do it yourself or hire a professional restoration company, the result will be beautiful, durable, and timeless hardwood floors that add warmth and character to your home.