

As a homeowner, one of the most satisfying projects you can undertake is refinishing your hardwood floors. Not only does it give your home a stunning makeover, but it also helps to restore the natural beauty of the wood and prolong the lifespan of your floors. In this ultimate guide, I will walk you through the step-by-step process of refinishing hardwood floors, along with some valuable tips and insights to ensure a successful outcome.
The Benefits of Refinishing Hardwood Floors
Refinishing hardwood floors offers a plethora of benefits that go beyond just aesthetics. One of the primary advantages is the restoration of the natural beauty and luster of the wood. Over time, hardwood floors can become dull, scratched, and worn out due to regular use. Refinishing helps to remove these imperfections and brings back the shine and richness of the wood.
Another benefit of refinishing hardwood floors is the added durability it provides. By sanding down the top layer and applying a fresh coat of finish, you are essentially creating a protective barrier that shields the wood from daily wear and tear. This not only extends the lifespan of your floors but also reduces the need for costly repairs or replacements in the future.
Signs That Your Hardwood Floors Need Refinishing
Before diving into the refinishing process, it’s essential to determine whether your hardwood floors actually need refinishing. Here are some signs to look out for:
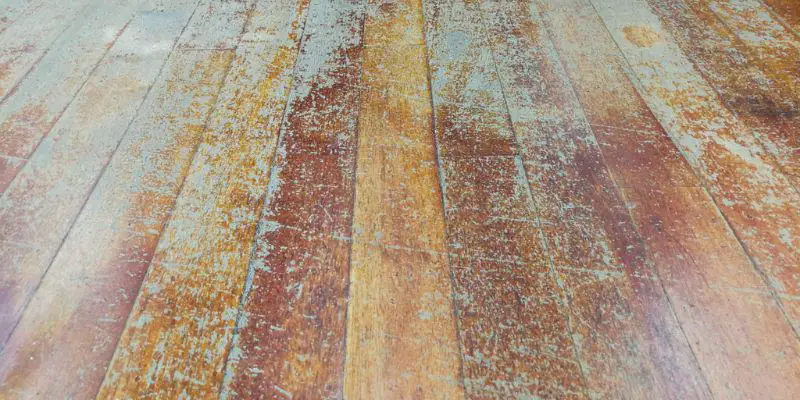
- Visible scratches and gouges: If your floors have deep scratches or gouges that are noticeable even after cleaning, it’s a clear indication that refinishing is needed.
- Dull and worn-out appearance: Over time, the top layer of finish on hardwood floors can wear off, leaving them looking dull and lackluster. Refinishing will restore the shine and vibrancy of your floors.
- Stains and discoloration: Stubborn stains or discoloration that cannot be removed through regular cleaning indicate that refinishing is necessary to eliminate these blemishes.
- Uneven or warped boards: If you notice any boards that are uneven or warped, refinishing can help to level out the surface and restore the uniformity of your floors.
Tools and Materials Needed for Hardwood Floor Refinishing
Before embarking on your hardwood floor refinishing journey, it’s crucial to gather all the necessary tools and materials. Here’s a comprehensive list of what you’ll need:

- Orbital sander: An orbital sander is essential for sanding down the existing finish and smoothing out any imperfections on the wood surface.
- Sandpaper: Different grits of sandpaper, ranging from coarse to fine, will be required for the sanding process. Start with coarse grit for initial sanding and gradually move to finer grits for a smooth finish.
- Floor buffer: A floor buffer equipped with a sanding screen is helpful for buffing the floors after sanding to ensure a smooth and even surface.
- Vacuum cleaner: A powerful vacuum cleaner is necessary to remove dust and debris from the sanding process. Make sure to choose one with good suction and a fine dust filter.
- Tack cloth: Tack cloths are sticky cloths used to wipe away fine dust particles that may be left behind after sanding.
- Wood stain and finish: Choose a high-quality wood stain and finish that suits your desired color and level of sheen. Oil-based and water-based options are available, each with its own pros and cons.
- Paintbrushes and rollers: These will be needed for applying the stain and finish to your floors.
- Protective gear: Don’t forget to wear safety goggles, a dust mask, and gloves to protect yourself during the refinishing process.
Step-by-Step Guide to Refinishing Hardwood Floors
Now that you have all the necessary tools and materials, let’s dive into the step-by-step process of refinishing your hardwood floors:
Step 1: Preparation
The first step is to prepare the room by removing all furniture and rugs. This will give you ample space to work and prevent any damage to your belongings. Additionally, make sure to cover any vents or openings to prevent dust from spreading to other areas of your home.
Step 2: Sanding
Start by using the coarsest grit sandpaper on your orbital sander to remove the existing finish and any imperfections on the wood surface. Work in the direction of the grain and move the sander slowly to ensure even sanding. Gradually switch to finer grits of sandpaper until you achieve a smooth and uniform surface. Remember to vacuum and wipe the floors with a tack cloth between each sanding to remove dust.

Step 3: Staining (optional)
If you wish to change the color of your floors, now is the time to apply the wood stain. Use a paintbrush or roller to apply an even coat of stain, working in small sections. Follow the manufacturer’s instructions regarding the drying time and number of coats required. Allow the stain to completely dry before moving on to the next step.

Step 4: Applying the Finish
Once the stain is dry (or if you’re skipping the staining step), it’s time to apply the finish. Use a clean paintbrush or roller to apply an even coat of finish, working in the direction of the grain. Allow the first coat to dry according to the manufacturer’s instructions before applying subsequent coats. Depending on the type of finish, you may need to lightly sand between coats for a smoother finish. Allow the final coat to dry completely before walking on the floors.

Step 5: Finishing Touches
After the final coat of finish has dried, you can add any finishing touches, such as installing new baseboards or adding rugs and furniture back into the room. Take care not to drag heavy furniture across the newly refinished floors to avoid scratching.
Related Post: How to clear up cloudiness on Hardwood floors.
Common Mistakes to Avoid During the Refinishing Process
While refinishing hardwood floors can be a rewarding project, there are some common mistakes that you should avoid to ensure a successful outcome:
- Insufficient sanding: Failing to sand the floors adequately can result in an uneven finish and poor adhesion of the new finish.
- Skipping the test patch: Before applying stain or finish to the entire floor, always test it on a small, inconspicuous area to ensure you achieve the desired color and finish.
- Applying too much finish: Applying thick coats of finish can lead to drying issues and a sticky, uneven surface. Follow the manufacturer’s instructions regarding the recommended number of coats and drying times.
- Not allowing sufficient drying time: Rushing the drying process can result in a compromised finish. Be patient and allow each coat of stain and finish to dry completely before proceeding to the next step.
- Neglecting proper ventilation: Ensure the room is well-ventilated during the refinishing process to prevent the buildup of fumes and ensure a healthier environment.
Tips for Maintaining and Prolonging the Lifespan of Refinished Hardwood Floors
After putting in the time and effort to refinish your hardwood floors, it’s important to implement proper maintenance practices to prolong their lifespan and keep them looking beautiful. Here are some tips to help you maintain your refinished hardwood floors:
Hiring a Professional vs. DIY Hardwood Floor Refinishing
Deciding whether to hire a professional or tackle the hardwood floor refinishing process yourself depends on several factors. If you have little to no experience with DIY projects or lack the necessary tools, hiring a professional is the safer choice. Professionals have the expertise and equipment to ensure a high-quality finish and can save you time and effort. However, if you enjoy hands-on projects and have the necessary skills and tools, DIY refinishing can be a rewarding and cost-effective option.
- Regular cleaning: Sweep or vacuum your floors regularly to remove dirt and debris that can scratch the surface. Avoid using harsh cleaning agents or excessive water, as these can damage the finish.
- Use rugs and furniture pads: Place rugs near entryways and high-traffic areas to prevent dirt and moisture from being tracked onto the floors. Use furniture pads under heavy furniture to prevent scratches and indentations.
- Avoid high heels and pets’ claws: High heels and pets’ claws can cause significant damage to the finish of your hardwood floors. Encourage family members and guests to remove their shoes and keep pets’ claws trimmed.
- Control humidity levels: Fluctuations in humidity can cause the wood to expand and contract, leading to gaps and warping. Use a humidifier in dry seasons and a dehumidifier in humid seasons to maintain a stable humidity level.
- Regular maintenance coats: Over time, the finish on your hardwood floors will experience wear. Applying maintenance coats of finish every few years will help to protect the wood and keep it looking fresh.
Cost Considerations for Hardwood Floor Refinishing
The cost of refinishing hardwood floors can vary depending on several factors, such as the size of the room, the condition of the floors, and the type of finish you choose. On average, you can expect to pay between $3 to $5 per square foot for professional refinishing services. If you decide to take the DIY route, you can save on labor costs but will need to budget for the purchase or rental of equipment and materials. It’s recommended to obtain multiple quotes from professionals or research the cost of materials before making a decision.
Conclusion: Enjoy Your Beautifully Refinished Hardwood Floors!
Refinishing your hardwood floors is a rewarding project that can transform the look and feel of your home. By following this ultimate guide and avoiding common mistakes, you’ll be well-equipped to tackle the refinishing process with confidence. Remember to take your time, gather all the necessary tools and materials, and implement proper maintenance practices to enjoy stunning results for years to come. Whether you choose to hire a professional or embark on a DIY adventure, the end result will be beautifully refinished hardwood floors that enhance the beauty and value of your home.
